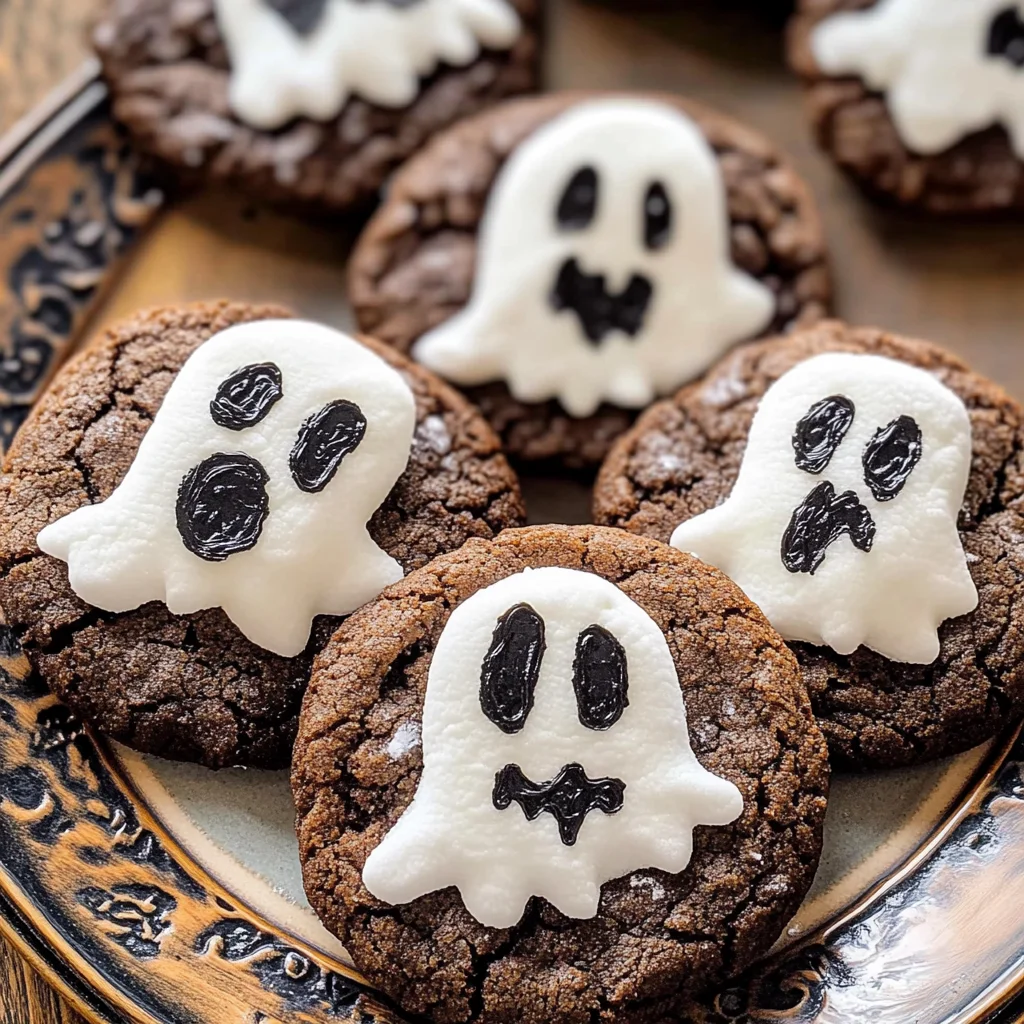
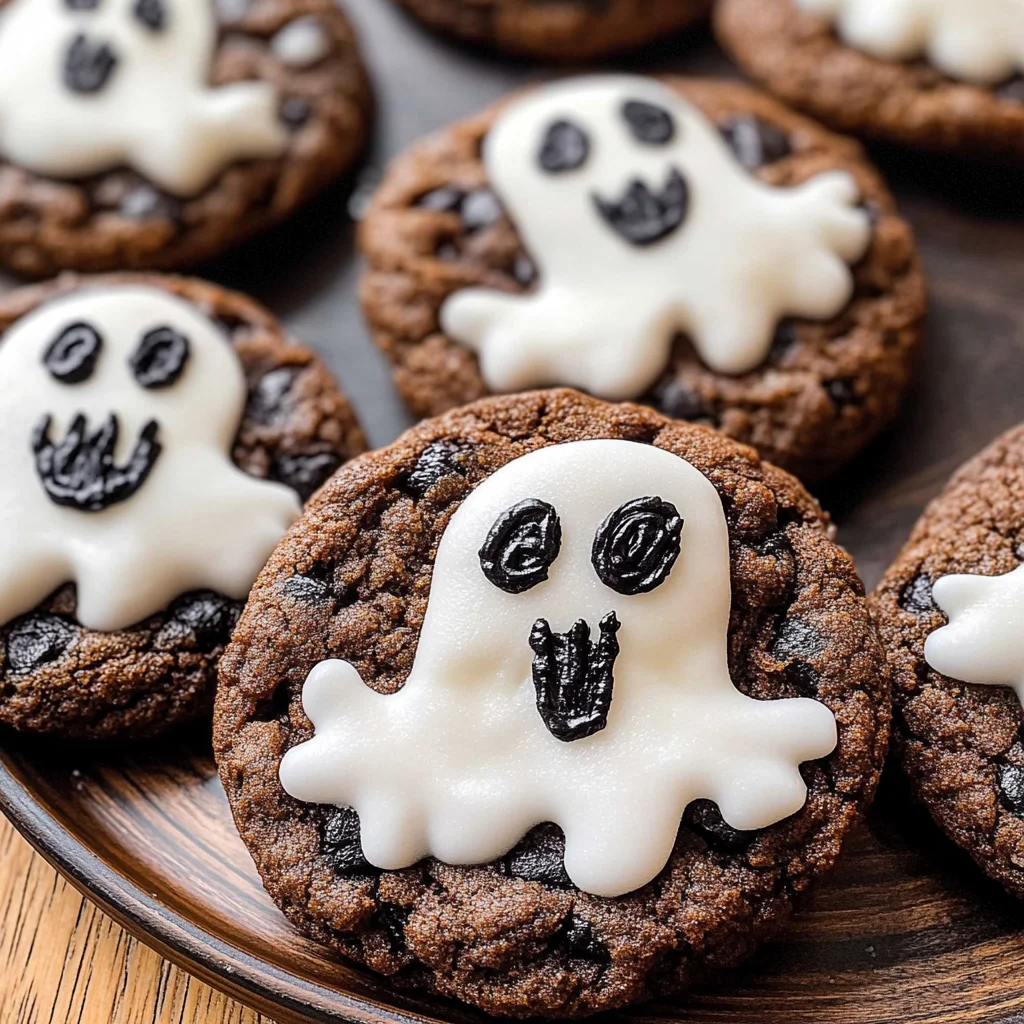
Ghost cookies
These Ghost cookies are a delightful twist on traditional treats, perfect for Halloween festivities or any spooky gathering. With their easy preparation and playful design, they appeal to both kids and adults alike. These cookies combine the taste of chocolate chunk cookies with the whimsical look of ghostly figures, making them a standout choice for parties or simple family fun.
Why You’ll Love This Recipe
- Quick to Prepare: With only 25 minutes of prep time, you can whip these up in no time.
- Fun for All Ages: Decorating these cookies is a great activity for kids and adults, ensuring everyone can get involved.
- Visually Appealing: The ghostly designs make these cookies a fun addition to any Halloween spread.
- Delicious Flavor: The combination of chocolate and sweet marshmallows creates a tasty treat that everyone will love.
- Versatile Enjoyment: These cookies can be enjoyed at various occasions beyond Halloween, such as birthday parties or casual gatherings.
Tools and Preparation
To create these spooky Ghost cookies, you’ll need some essential tools. Having the right equipment makes the process smoother and ensures your treats turn out perfectly.
Essential Tools and Equipment
- Baking sheet
- Parchment paper
- Mixing bowl
- Spatula
- Microwave-safe bowl
Importance of Each Tool
- Baking sheet: Provides an even surface for baking your cookies, ensuring they cook uniformly.
- Parchment paper: Prevents sticking and makes cleanup easier after baking.
- Mixing bowl: Essential for combining your icing sugar with other ingredients smoothly.
- Spatula: Helps in spreading icing accurately on each cookie for that perfect ghostly look.
Ingredients
For the Icing
- 175g icing sugar
For the Cookies
- 1 x 200g pack chocolate chunk cookies
For the Topping
- 9 vegan marshmallows (regular size)
- black writing icing
How to Make Ghost cookies
Step 1: Prepare Your Workspace
Ensure you have a clean, organized workspace to begin making your Ghost cookies. Lay out all your ingredients and tools, so everything is within reach.
Step 2: Create the Icing Mixture
- In a mixing bowl, combine the icing sugar with a small amount of water until you achieve a smooth consistency that can be easily spread.
- If it’s too thick, add more water gradually until it reaches the desired texture.
Step 3: Decorate the Cookies
- Place your chocolate chunk cookies on a baking sheet lined with parchment paper.
- Use a spatula to spread the icing mixture over each cookie generously.
- Cut each vegan marshmallow in half horizontally and place one half on top of each iced cookie as the ghost’s head.
Step 4: Add Ghost Faces
Using the black writing icing, draw spooky eyes and mouths on each marshmallow half to give your ghosts personality!
Enjoy your deliciously spooky Ghost cookies, perfect for any festive occasion!
How to Serve Ghost cookies
Ghost cookies are perfect for Halloween parties or fun gatherings. Their spooky appearance will delight both kids and adults, making them a festive treat. Here are some creative serving suggestions to enhance your ghostly cookie experience.
Serve with Hot Chocolate
- Pairing ghost cookies with hot chocolate creates a cozy atmosphere. The warm drink complements the sweet taste of the cookies.
Add to a Halloween Dessert Platter
- Include ghost cookies on a dessert platter alongside other Halloween treats like mini cupcakes and candy corn for an eye-catching display.
Garnish with Edible Glitter
- Sprinkling edible glitter over the cookies adds a magical touch, making them even more appealing for special occasions.
Wrap as Party Favors
- Wrap individual ghost cookies in clear bags tied with ribbon. This makes for a charming party favor that guests can take home.
How to Perfect Ghost cookies
To make your ghost cookies truly stand out, follow these handy tips. They will help ensure your spooky treats are not only delicious but also visually appealing.
- Use Fresh Ingredients: Fresh ingredients, especially for the cookies and icing, enhance flavor and texture, making your ghost cookies irresistible.
- Ensure Proper Icing Consistency: The icing should be thick enough to hold its shape but not too runny. Aim for a smooth, spreadable consistency that won’t drip off the cookies.
- Experiment with Designs: Get creative with black writing icing! Try different ghost faces or spooky designs to make each cookie unique and fun.
- Keep Cookies Cool: Allow the cookies to cool completely before decorating to prevent the icing from melting or losing its shape.
Best Side Dishes for Ghost cookies
Ghost cookies can be enjoyed alongside various side dishes that complement their sweet flavor. Here’s a list of delightful options to consider when serving these spooky treats.
- Fruit Salad: A refreshing mix of seasonal fruits balances the sweetness of the ghost cookies and adds color to your table.
- Popcorn Mix: Create a Halloween-themed popcorn mix with pumpkin spice and candy corn for an exciting crunch that pairs well with your treats.
- Cheese Platter: A selection of mild cheeses and crackers provides a savory contrast to the sweetness of the cookies, perfect for varied palates.
- Caramel Dipped Apples: These sweet treats add a fun twist and enhance the autumn vibe when served alongside ghost cookies.
- Veggie Sticks with Hummus: Crisp veggie sticks paired with hummus offer a healthy option, balancing out the indulgence of sweet desserts.
- Chocolate-Covered Pretzels: Salty pretzels dipped in chocolate provide a delightful crunchy texture that complements the softness of ghost cookies.
Common Mistakes to Avoid
When making Ghost cookies, it’s easy to overlook some key details that can affect the outcome. Here are common mistakes to watch for:
- Ignoring measurements – Accurately measuring ingredients is crucial for success. Always use a kitchen scale or measuring cups.
- Using stale cookies – Fresh cookies yield the best results. Check the expiration date on your chocolate chunk cookies before using them.
- Overheating icing – If your icing sugar mixture gets too warm, it won’t set properly. Mix at room temperature for best consistency.
- Skipping the cooling time – Allowing cookies to cool before decorating helps the icing adhere better and prevents melting marshmallows.
Storage & Reheating Instructions
Refrigerator Storage
- Store Ghost cookies in an airtight container for up to 3 days.
- Keep them at room temperature for optimal texture and flavor.
Freezing Ghost cookies
- Freeze Ghost cookies by placing them in a single layer on a baking sheet until solid, then transfer to an airtight container.
- They can be frozen for up to 2 months.
Reheating Ghost cookies
- Oven – Preheat to 350°F (175°C) and heat for about 5 minutes until warm.
- Microwave – Heat each cookie individually for about 10-15 seconds. Be cautious not to overheat as they may become tough.
- Stovetop – Place a cookie in a non-stick skillet over low heat for about 30 seconds, flipping once.
Frequently Asked Questions
If you’re curious about making Ghost cookies, you might have some questions. Here are answers to common queries:
What are Ghost cookies?
Ghost cookies are delightful Halloween treats made from chocolate chunk cookies decorated with vegan marshmallows and icing to resemble spooky ghosts.
Can I customize my Ghost cookies?
Absolutely! You can add food coloring to the icing, use different shapes of marshmallows, or even sprinkle edible glitter for added fun.
How long do Ghost cookies last?
Ghost cookies can be stored in an airtight container at room temperature for about three days or frozen for up to two months.
Are there any alternatives for the ingredients?
Yes! You can substitute chocolate chunk cookies with other cookie varieties or even make your own from scratch if preferred.
Final Thoughts
Ghost cookies are a fun and festive treat perfect for Halloween gatherings. Their versatility allows you to customize decorations based on your creativity. Whether it’s adding sprinkles or using different types of marshmallows, there’s no limit! Try making these delightful treats today!
Ghost Cookies
Ghost cookies are a delightful Halloween treat that combines the classic taste of chocolate chunk cookies with a whimsical ghostly design. Perfect for festive gatherings or family fun, these spooky snacks are easy to make and offer a creative outlet for decorating. With just a few simple ingredients and minimal preparation time, you can create these charming cookies that will enchant both kids and adults alike. Decorated with sweet vegan marshmallows and playful icing faces, they make an eye-catching addition to any dessert table. Enjoy making these Ghost cookies as a cheerful activity during the Halloween season or any time you’re in the mood for a fun baking project!
- Prep Time: 25 minutes
- Cook Time: 10 minutes
- Total Time: 35 minutes
- Yield: Approximately 10 servings 1x
- Category: Dessert
- Method: Baking
- Cuisine: American
Ingredients
- 175g icing sugar
- 1 x 200g pack chocolate chunk cookies
- 9 vegan marshmallows (regular size)
- black writing icing
Instructions
- Prepare your workspace by organizing all ingredients and tools.
- In a mixing bowl, combine icing sugar with a small amount of water until smooth; adjust consistency as needed.
- Place chocolate chunk cookies on a parchment-lined baking sheet and spread the icing over each cookie.
- Cut vegan marshmallows in half horizontally and place one half on each iced cookie as the ghost's head.
- Use black writing icing to draw spooky faces on each marshmallow.
Nutrition
- Serving Size: 1 cookie (40g)
- Calories: 160
- Sugar: 15g
- Sodium: 45mg
- Fat: 6g
- Saturated Fat: 2g
- Unsaturated Fat: 4g
- Trans Fat: 0g
- Carbohydrates: 27g
- Fiber: 1g
- Protein: 2g
- Cholesterol: 0mg